Interactivity
| Authors: | Casey Reas and Ben Fry; Arihant Parsoya (p5 port) |
|---|---|
| Copyright: | This tutorial is the “Interactivity” chapter from Processing: A Programming Handbook for Visual Designers and Artists, Second Edition, published by MIT Press. © 2014 MIT Press. If you see any errors or have comments, please let us know. The tutorial was ported to p5 by Arihant Parsoya. If you see any errors or have comments, open an issue on either the p5 or Processing repositories. |
The screen forms a bridge between our bodies and the realm of circuits and electricity inside computers. We control elements on screen through a variety of devices such as touch pads, trackballs, and joysticks, but the keyboard and mouse remain the most common input devices for desktop computers. The computer mouse dates back to the late 1960s, when Douglas Engelbart presented the device as an element of the oN-Line System (NLS), one of the first computer systems with a video display. The mouse concept was further developed at the Xerox Palo Alto Research Center (PARC), but its introduction with the Apple Macintosh in 1984 was the catalyst for its current ubiquity. The design of the mouse has gone through many revisions in the last forty years, but its function has remained the same. In Engelbart’s original patent application in 1970 he referred to the mouse as an “X-Y position indicator,” and this still accurately, but dryly, defines its contemporary use.
The physical mouse object is used to control the position of the cursor on screen and to select interface elements. The cursor position is read by computer programs as two numbers, the x-coordinate and the y-coordinate. These numbers can be used to control attributes of elements on screen. If these coordinates are collected and analyzed, they can be used to extract higher-level information such as the speed and direction of the mouse. This data can in turn be used for gesture and pattern recognition.
Keyboards are typically used to input characters for composing documents, email, and instant messages, but the keyboard has potential for use beyond its original intent. The migration of the keyboard from typewriter to computer expanded its function to enable launching software, moving through the menus of software applications, and navigating 3D environments in games. When writing your own software, you have the freedom to use the keyboard data any way you wish. For example, basic information such as the speed and rhythm of the fingers can be determined by the rate at which keys are pressed. This information could control the speed of an event or the quality of motion. It’s also possible to ignore the characters printed on the keyboard itself and use the location of each key relative to the keyboard grid as a numeric position.
The modern computer keyboard is a direct descendant of the typewriter. The position of the keys on an English-language keyboard is inherited from early typewriters. This layout is called QWERTY because of the order of the top row of letter keys. This more than one-hundred-year-old mechanical legacy still affects how we write software today.
Mouse Data
The Processing variables mouse_x and mouse_y store the x-coordinate and y-coordinate of the cursor relative to the origin in the upper-left corner of the display window. To see the actual values produced while moving the mouse, run this program to print the values to the console:
def draw():
   # Your draw goes here
   print(mouse_x, " : ", mouse_y) # Use this at the end of the draw to
                                  # print in console the mouse x and y

run(frame_rate=12) # Use this to control the frame rate
When a program starts, the mouse_x and mouse_y values are 0. If the cursor moves into the display window, the values are set to the current position of the cursor. If the cursor is at the left, the mouse_x value is 0 and the value increases as the cursor moves to the right. If the cursor is at the top, the mouse_y value is 0 and the value increases as the cursor moves down. If mouse_x and mouse_y are used in programs without a draw() or if no_loop() is run in setup(), the values will always be 0.
The mouse position is most commonly used to control the location of visual elements on screen. More interesting relations are created when the visual elements relate differently to the mouse values, rather than simply mimicking the current position. Adding and subtracting values from the mouse position creates relationships that remain constant, while multiplying and dividing these values creates changing visual relationships between the mouse position and the elements on the screen. In the first of the following examples, the circle is directly mapped to the cursor, in the second, numbers are added and subtracted from the cursor position to create offsets, and in the third, multiplication and division are used to scale the offsets.

from p5 import *

def setup():
   size(100, 100)
   no_stroke()

def draw():
   background(126)
   ellipse((mouse_x, mouse_y), 33, 33)

if __name__ == '__main__':
   run()


from p5 import *

def setup():
   size(100, 100)
   no_stroke()

def draw():
   background(126)
   ellipse((mouse_x, 16), 33, 33) # Top circle
   ellipse((mouse_x+20, 50), 33, 33) # Middle circle
   ellipse((mouse_x-20, 84), 33, 33) # Bottom circle

if __name__ == '__main__':
   run()


from p5 import *

def setup():
   size(100, 100)
   no_stroke()

def draw():
   background(126)
   ellipse((mouse_x, 16), 33, 33) # Top circle
   ellipse((mouse_x/2, 50), 33, 33) # Middle circle
   ellipse((mouse_x*2, 84), 33, 33) # Bottom circle

if __name__ == '__main__':
   run()
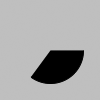
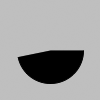
To invert the value of the mouse, subtract the mouse_x value from the width of the window and subtract the mouse_y value from the height of the screen.


from p5 import *

def setup():
   size(100, 100)
   no_stroke()

def draw():
   background(126)
   x = mouse_x
   y = mouse_y
   ix = width - mouse_x # Inverse X
   iy = height - mouse_y # Inverse Y
   background(126)
   fill(255, 150)
   ellipse((x, height/2), y, y)
   fill(0, 159)
   ellipse((ix, height/2), iy, iy)

if __name__ == '__main__':
   run()
The Processing variables pmouse_x and pmouse_y store the mouse values from the previous frame. If the mouse does not move, the values will be the same, but if the mouse is moving quickly there can be large differences between the values. To see the difference, run the following program and alternate moving the mouse slowly and quickly. Watch the values print to the console.
def draw():
   # Your draw goes here
   print(mouse_x, " : ", mouse_y) # Use this at the end of the draw to
                                  # print in console the mouse x and y

run(frame_rate=12) # Use this to control the frame rate
Draw a line from the previous mouse position to the current position to show the changing position in one frame and reveal the speed and direction of the mouse. When the mouse is not moving, a point is drawn, but quick mouse movements create long lines.

from p5 import *

def setup():
   size(100, 100)
   stroke_weight(8)

def draw():
   background(204)
   line((mouse_x, mouse_y), (pmouse_x, pmouse_y))

if __name__ == '__main__':
   run()
Use the mouse_x and mouse_y variables with an if structure to allow the cursor to select regions of the screen. The following examples demonstrate the cursor making a selection between different areas of the display window. The first divides the screen into halves, and the second divides the screen into thirds.


from p5 import *

def setup():
   size(100, 100)
   no_stroke()
   fill(0)

def draw():
   background(204)
   if mouse_x < 50:
      rect((0, 0), 50, 100)
   else:
      rect((50, 0), 50, 100)

if __name__ == '__main__':
   run()


from p5 import *

def setup():
   size(100, 100)
   no_stroke()
   fill(0)

def draw():
   background(204)
   if mouse_x < 33:
      rect((0, 0), 33, 100)
   elif mouse_x < 66:
      rect((33, 0), 33, 100)
   else:
      rect((66, 0), 33, 100)

if __name__ == '__main__':
   run()
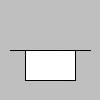
Use the logical operator and with an if structure to select a rectangular region of the screen. As demonstrated in the following example, when a relational expression is made to test each edge of a rectangle (left, right, top, bottom) and these are concatenated with a logical AND, the entire relational expression is true only when the cursor is inside the rectangle.


from p5 import *

def setup():
   size(100, 100)
   no_stroke()
   fill(0)

def draw():
   background(204)
   if ((mouse_x > 40) and (mouse_x < 80) and
         (mouse_y > 20) and (mouse_y < 80)):
      fill(255)
   else:
      fill(0)

   rect((40, 20), 40, 60)

if __name__ == '__main__':
   run()
This code asks, “Is the cursor to the right of the left edge and is the cursor to the left of the right edge and is the cursor beyond the top edge and is the cursor above the bottom?” The code for the next example asks a set of similar questions and combines them with the keyword else to determine which one of the defined areas contains the cursor.


from p5 import *

def setup():
   size(100, 100)
   no_stroke()
   fill(0)

def draw():
   background(204)
   if (mouse_x <= 50) and (mouse_y <= 50):
      rect((0, 0), 50, 50) # Upper-left
   elif (mouse_x <= 50) and (mouse_y > 50):
      rect((0, 50), 50, 50) # Lower-left
   elif (mouse_x > 50) and (mouse_y <= 50):
      rect((50, 0), 50, 50) # Upper-right
   else:
      rect((50, 50), 50, 50) # Lower-right

if __name__ == '__main__':
   run()
Mouse buttons
Computer mice and other related input devices typically have between one and three buttons; Processing can detect when these buttons are pressed with the mouse_is_pressed and mouse_button variables. Used with the button status, the cursor position enables the mouse to perform different actions. For example, a button press when the mouse is over an icon can select it, so the icon can be moved to a different location on screen. The mouse_is_pressed variable is true if any mouse button is pressed and false if no mouse button is pressed. The variable mouse_button is LEFT, CENTER, or RIGHT depending on the mouse button most recently pressed. The mouse_is_pressed variable reverts to false as soon as the button is released, but the mouse_button variable retains its value until a different button is pressed. These variables can be used independently or in combination to control the software. Run these programs to see how the software responds to your fingers.

from p5 import *

def setup():
   size(100, 100)


def draw():
   background(204)
   if mouse_is_pressed:
      fill(255)
   else:
      fill(0)
   rect((25, 25), 50, 50)

if __name__ == '__main__':
   run()

from p5 import *

def setup():
   size(100, 100)

def draw():
   background(204)
   if mouse_button == "LEFT":
      fill(0)
   elif mouse_button == "RIGHT":
      fill(255)
   else:
      fill(126)

   rect((25, 25), 50, 50)

if __name__ == '__main__':
   run()

from p5 import *

def setup():
   size(100, 100)

def draw():
   background(204)
   if mouse_is_pressed:
      if mouse_button == "LEFT":
         fill(0)
      else:
         fill(255)
   else:
      fill(126)

   rect((25, 25), 50, 50)

if __name__ == '__main__':
   run()
Not all mice have multiple buttons, and if software is distributed widely, the interaction should not rely on detecting which button is pressed.
Keyboard data
Processing registers the most recently pressed key and whether a key is currently pressed. The boolean variable key_is_pressed is true if a key is pressed and is false if not. Include this variable in the test of an if structure to allow lines of code to run only if a key is pressed. The key_is_pressed variable remains true while the key is held down and becomes false only when the key is released.

from p5 import *

def setup():
   size(100, 100)
   stroke_weight(4)

def draw():
   background(204)

   if key_is_pressed:
      line((20, 20), (80, 80))
   else:
      rect((40, 40), 20, 20)

if __name__ == '__main__':
   run()
from p5 import *

x = 20

def setup():
   size(100, 100)
   stroke_weight(4)

def draw():
   background(204)

   global x
   if key_is_pressed:
      x += 1

   line((x, 20), (x-60, 80))

if __name__ == '__main__':
   run()
The key variable stores a single alphanumeric character. Specifically, it holds the most recently pressed key. The key can be displayed on screen with the text() function (p. 150).

from p5 import *

def setup():
   size(100, 100)
   text_size(60)

def draw():
   background(0)
   text(key, 20, 75) # Draw at coordinate (20,75)

if __name__ == '__main__':
   run()
The key variable may be used to determine whether a specific key is pressed. The following example uses the expression key=='A' to test if the A key is pressed. The single quotes signify A as the data type char (p. 144). The expression key=="A" will cause an error because the double quotes signify the A as a String, and it’s not possible to compare a String with a char. The logical AND symbol, the && operator, is used to connect the expression with the keyPressed variable to ascertain that the key pressed is the uppercase A.


from p5 import *

def setup():
   size(100, 100)
   stroke_weight(4)

def draw():
   background(204)
   # If the 'A' key is pressed draw a line
   if key_is_pressed and key == "A":
      line((50, 25), (50, 75))
   else: # Otherwise, draw an ellipse
      ellipse((50, 50), 50, 50)

if __name__ == '__main__':
   run()
The previous example works with an uppercase A, but not if the lowercase letter is pressed. To check for both uppercase and lowercase letters, extend the relational expression with a logical OR, the || relational operator. Line 9 in the previous program would be changed to:
if key_is_pressed and ((key == 'a') || (key == 'A')):
Because each character has a numeric value as defined by the ASCII table (p. 605), the value of the key variable can be used like any other number to control visual attributes such as the position and color of shape elements. For instance, the ASCII table defines the uppercase A as the number 65, and the digit 1 is defined as 49.
from p5 import *

def setup():
   size(100, 100)
   stroke(0)

def draw():
   if key_is_pressed:
      x = ord(str(key)) - 32
      line((x, 0), (x, height))

if __name__ == '__main__':
   run()
from p5 import *

angle = 0

def setup():
   size(100, 100)
   fill(0)

def draw():
   background(204)

   global angle
   if key_is_pressed:
      if (ord(str(key)) >= 32) and (ord(str(key)) <= 126):
         #  If the key is alphanumeric, use its value as an angle
         angle = (ord(str(key)) - 32) * 3

   arc((50, 50), 66, 66, 0, radians(angle))

if __name__ == '__main__':
   run()
Coded keys
In addition to reading key values for numbers, letters, and symbols, Processing can also read the values from other keys including the arrow keys and the Alt, Control, Shift, Backspace, Tab, Enter, Return, Escape, and Delete keys. The variable keyCode stores the ALT, CONTROL, SHIFT, UP, DOWN, LEFT, and RIGHT keys as constants. Before determining which coded key is pressed, it’s necessary to check first to see if the key is coded. The expression key==CODED is true if the key is coded and false otherwise. Even though not alphanumeric, the keys included in the ASCII specification (BACKSPACE, TAB, ENTER, RETURN, ESC, and DELETE) will not be identified as a coded key. If you’re making cross-platform projects, note that the Enter key is commonly used on PCs and UNIX and the Return key is used on Macintosh. Check for both Enter and Return to make sure your program will work for all platforms.
from p5 import *

y = 0

def setup():
    size(100, 100)

def draw():
    global y
    background(204)
    line((10, 50), (90, 50))

    if key == "UP":
        y = 20
    elif key == "DOWN":
        y = 50
    else:
        y = 35

    rect((25, y), 50, 30)

if __name__ == '__main__':
    run()
Events
A category of functions called events alter the normal flow of a program when an action such as a key press or mouse movement takes place. An event is a polite interruption of the normal flow of a program. Key presses and mouse movements are stored until the end of draw(), where they can take action that won’t disturb drawing that’s currently in progress. The code inside an event function is run once each time the corresponding event occurs. For example, if a mouse button is pressed, the code inside the mouse_pressed() function will run once and will not run again until the button is pressed again. This allows data produced by the mouse and keyboard to be read independently from what is happening in the rest of the program.
Mouse events
The mouse event functions are mouse_pressed(), mouse_released(), mouse_moved(), and mouse_dragged():
mouse_pressed() Code inside this block is run one time when a mouse button is pressed mouse_released() Code inside this block is run one time when a mouse button is released mouse_moved() Code inside this block is run one time when the mouse is moved mouse_dragged() Code inside this block is run one time when the mouse is moved while a mouse button is pressed
The mouse_pressed() function works differently than the mouse_is_pressed variable. The value of the mouse_is_pressed variable is true until the mouse button is released. It can therefore be used within draw() to have a line of code run while the mouse is pressed. In contrast, the code inside the mouse_pressed() function only runs once when a button is pressed. This makes it useful when a mouse click is used to trigger an action, such as clearing the screen. In the following example, the background value becomes lighter each time a mouse button is pressed. Run the example on your computer to see the change in response to your finger.


from p5 import *

gray = 0

def setup():
   size(100, 100)

def draw():
   background(gray)

def mouse_pressed():
   global gray
   gray += 20

if __name__ == '__main__':
   run()
The following example is the same as the one above, but the gray variable is set in the mouse_released() event function, which is called once every time a button is released. This difference can be seen only by running the program and clicking the mouse button. Keep the mouse button pressed for a long time and notice that the background value changes only when the button is released.


from p5 import *

gray = 0

def setup():
   size(100, 100)

def draw():
   background(gray)

def mouse_released():
   global gray
   gray += 20

if __name__ == '__main__':
   run()
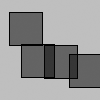
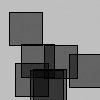
It is generally not a good idea to draw inside an event function, but it can be done under certain conditions. Before drawing inside these functions, it’s important to think about the flow of the program. In this example, squares are drawn inside mouse_pressed() and they remain on screen because there is no background() inside draw(). But if background() is used, visual elements drawn within one of the mouse event functions will appear on screen for only a single frame, or, by default, 1/60th of a second. In fact, you’ll notice this example has nothing at all inside draw(), but it needs to be there to force Processing to keep listening for the events. If a background() function were run inside draw(), the rectangles would flash onto the screen and disappear.
from p5 import *

def setup():
   size(100, 100)
   fill(0, 102)

def draw():
   # Empty draw() keeps the program running
   pass

def mouse_pressed():
   rect((mouse_x, mouse_y), 33, 33)

if __name__ == '__main__':
   run()
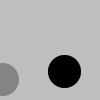
The code inside the mouse_moved() and mouse_dragged() event functions are run when there is a change in the mouse position. The code in the mouse_moved() block is run at the end of each frame when the mouse moves and no button is pressed. The code in the mouse_dragged() block does the same when the mouse button is pressed. If the mouse stays in the same position from frame to frame, the code inside these functions does not run. In this example, the gray circle follows the mouse when the button is not pressed, and the black circle follows the mouse when a mouse button is pressed.


from p5 import *

dragX = 0
dragY = 0
moveX = 0
moveY = 0

def setup():
   size(100, 100)
   no_stroke()

def draw():
   background(204)
   fill(0)

   ellipse((dragX, dragY), 33, 33) # Black circle
   fill(153)
   ellipse((moveX, moveY), 33, 33) # Gray circle

def mouse_moved():
   global moveX, moveY
   moveX = mouse_x
   moveY = mouse_y

def mouse_dragged():
   global dragX, dragY
   dragX = mouse_x
   dragY = mouse_y

if __name__ == '__main__':
   run()
Key events
Each key press is registered through the keyboard event functions key_pressed() and key_released():
key_pressed() Code inside this block is run one time when any key is pressed key_released() Code inside this block is run one time when any key is released
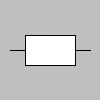
Each time a key is pressed, the code inside the key_pressed() block is run once. Within this block, it’s possible to test which key has been pressed and to use this value for any purpose. If a key is held down for an extended time, the code inside the key_pressed() block might run many times in a rapid succession because most operating systems will take over and repeatedly call the key_pressed() function. The amount of time it takes to start repeating and the rate of repetitions will be different from computer to computer, depending on the keyboard preference settings. In this example, the value of the boolean variable drawT is set from false to true when the T key is pressed; this causes the lines of code to render the rectangles in draw() to start running.


from p5 import *

drawT = False

def setup():
   size(100, 100)
   no_stroke()

def draw():
   background(204)

   global drawT
   if drawT:
      rect((20, 20), 60, 20)
      rect((39, 40), 22, 45)


def key_pressed():
   global drawT
   if key == "T" or key == "t":
      drawT = True

if __name__ == '__main__':
   run()
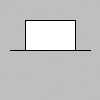
Each time a key is released, the code inside the key_released() block is run once. The following example builds on the previous code; each time the key is released the boolean variable drawT is set back to false to stop the shape from displaying within draw().


from p5 import *

drawT = False

def setup():
   size(100, 100)
   no_stroke()

def draw():
   background(204)

   global drawT
   if drawT:
      rect((20, 20), 60, 20)
      rect((39, 40), 22, 45)


def key_pressed():
   global drawT
   if key == "T" or key == "t":
      drawT = True

def key_released():
   global drawT
   drawT = False

if __name__ == '__main__':
   run()
Event flow
As discussed previously, programs written with draw() display frames to the screen sixty frames each second. The frame_rate() function is used to set a limit on the number of frames that will display each second, and the no_loop() function can be used to stop draw() from looping. The additional functions loop() and redraw() provide more options when used in combination with the mouse and keyboard event functions. If a program has been paused with no_loop(), running loop() resumes its action. Because the event functions are the only elements that continue to run when a program is paused with no_loop(), the loop() function can be used within these events to continue running the code in draw(). The following example runs the draw() function for about two seconds each time a mouse button is pressed and then pauses the program after that time has elapsed.
from p5 import *

frame = 0

def setup():
   size(100, 100)

def draw():
   global frame
   if frame > 120: #  If 120 frames since the mouse
      no_loop() # was pressed, stop the program
      background(0) # and turn the background black.
   else:
      background(204) # to light gray and draw lines
      line((mouse_x, 0), (mouse_x, 100)) # at the mouse position
      line((0, mouse_y), (100, mouse_y))
      frame += 1

def mouse_pressed():
   global frame
   loop()
   frame = 0

if __name__ == '__main__':
   run()
The redraw() function runs the code in draw() one time and then halts the execution. It’s helpful when the display needn’t be updated continuously. The following example runs the code in draw() once each time a mouse button is pressed.
from p5 import *

def setup():
   size(100, 100)
   no_loop()

def draw():
   background(204)
   line((mouse_x, 0), (mouse_x, 100))
   line((0, mouse_y), (100, mouse_y))

def mouse_pressed():
   redraw() # Run the code in draw one time

if __name__ == '__main__':
   run()