PShape
| Authors: | Daniel Shiffman; Arihant Parsoya (p5 port) |
|---|---|
| Copyright: | If you see any errors or have comments, please let us know. The tutorial was ported to p5 by Arihant Parsoya. If you see any errors or have comments, open an issue on either the p5 or Processing repositories. |
One of the very first things you learn when programming with Processing is how to draw “primitive” shapes to the screen: rectangles, ellipses, lines, triangles, and more.
rect((x,y),w,h)
ellipse((x,y),w,h)
line((x1,y1),(x2,y2))
triangle((x1,y1),(x2,y2),(x3,y3))
A more advanced drawing option is to use begin_shape() and end_shape() to specify the vertices of a custom polygon
beginShape()
vertex(x1,y1)
vertex(x2,y2)
vertex(x3,y3)
vertex(x4,y4)
# etc
endShape()
And you can build more complex shapes by grouping a set of drawing functions together, even perhaps organizing them into a class.
class MyWackyShape:

        # constructor

        # some functions

        def display(self):
                begin_shape()
                vertex(x1,y1)
                vertex(x2,y2)
                vertex(x3,y3)
                vertex(x4,y4)
                # etc
                end_shape()
This is all well and good and will get you pretty far. There’s very little you can’t draw just knowing the above. However, there is another step. A step that can, in some cases, improve the speed of your rendering as well as offer a more advanced organizational model for your code—PShape.
PShape is a datatype for storing shapes. These can be shapes that you build out of custom geometry or shapes that you load from an external file, such as an SVG.
Primitive PShapes
Let’s begin with one of the simplest cases for use of a PShape. Here’s a simple Processing draw() method that draws an rectangle following the mouse.
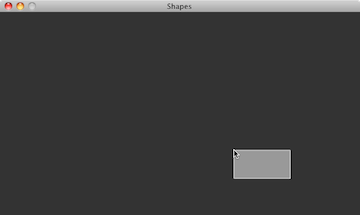
def draw():
        background(51)
        stroke(255)
        fill(127)
        rect((mouse_x, mouse_y), 100, 50)
Pretty basic stuff. If this was all the code we had, there’s not necessarily a good reason for using a PShape instead, but we’re going to push ahead and make a PShape rectangle anyway as a demonstration. Our goal here is to have a variable that stores the color and dimensions of that variable, allowing our draw function to look like this.
def draw():
        background(51)
        draw_shape(rectangle)
And what is this “rectangle”? It’s a PShape.
To initialize a PShape, use the PShape() method. The first argument for PShape() is a constant, and this constant specifies the type of PShape you intend to make. Here we are making a primitive shape, a rectangle. So now our setup() should look like:
rectangle = None

def setup():
        size(640, 360)
        rectangle = PShape()
We can then move the shape according to the mouse with translate.
def draw():
        background(51)
        translate(mouse_x, mouse_y)
        draw_shape(rectangle)
One of the nice things about the PShape object is that it can also store color information in addition to geometry. Once a shape has been created in order to alter its fill or stroke, use the methods set_fill(), set_stroke(), set_stroke_weight(), etc.
def setup():
        size(640, 260)
        rectangle = PShape()
        with rectangle.edit():
                rectangle.add_vertex((0, 0))
                rectangle.add_vertex((50, 0))
                rectangle.add_vertex((50, 100))
                rectangle.add_vertex((0, 100))

        rectangle.stroke = color(255)
        rectangle.stroke_weight = 4
        rectangle._fill = color(127)
These methods can be called during draw() as well if you want to change the color of the shape dynamically.

def draw():
        background(51)
        translate(mouse_x, mouse_y)
        rectangle.set_fill(color(remap(mouse_x, (0, width), (0, 255))))
        draw_shape(rectangle)
It should be noted that unlike with fill() and stroke() you must pass a full color as an argument. i.e. instead of saying set_fill(255,0,0) for a red fill, you’ll need to say set_fill(color(255,0,0)). In addition, set_fill() and set_stroke() can take a boolean argument (e.g. set_fill(false)) to turn the fill or stroke on or off for a given vertex as well as an integer (e.g. set_fill(i,color(255,0,0))) to set the fill or stroke for a specific vertex.
Custom PShapes
PShapes also can be configured with custom vertices. You’ve probably done this before, without PShape, just using begin_shape() and end_shape(). For example, let’s say you wanted to draw a star in Processing. You might have some code as follows:

def draw():
        background(51)
        translate(mouse_x, mouse_y)
        fill(102)
        stroke(255)
        stroke_weight(2)
        begin_shape()
        vertex(0, -50)
        vertex(14, -20)
        vertex(47, -15)
        vertex(23, 7)
        vertex(29, 40)
        vertex(0, 25)
        vertex(-29, 40)
        vertex(-23, 7)
        vertex(-47, -15)
        vertex(-14, -20)
        end_shape("CLOSE")
Here, just as in the previous example, our goal will be to draw the shape itself as an object in draw().
def draw():
        size(640, 360)
        star = PShape() # First create the shape
        with rectangle.edit():
                # All the vertex information goes here.
Then all the vertices (and colors) can be specified by calling the functions on the new PShape object “star.” Note that fill() and stroke are not required here, only if you choose to alter the colors after the shape has been initially created.
def setup():
        global star
        size(640, 360)

        # First create the shape
        star = PShape()

        with star.edit():
                star.add_vertex((0, -50))
                star.add_vertex((14, -20))
                star.add_vertex((47, -15))
                star.add_vertex((23, 7))
                star.add_vertex((29, 40))
                star.add_vertex((0, 25))
                star.add_vertex((-29, 40))
                star.add_vertex((-23, 7))
                star.add_vertex((-47, -15))
                star.add_vertex((-14, -20))
Many PShapes
As we mentioned earlier, one reason to use PShape is just to help you organize your geometry. However, there’s another reason. Let’s assume for a moment that you have a Star class, with a display() function that looks like so:
def display():
    with push_matrix():
        translate(x, y)
        fill(102)
        stroke(255)
        stroke_weight(2)

        begin_shape()
        vertex(0, -50)
        vertex(14, -20)
        vertex(47, -15)
        vertex(23, 7)
        vertex(29, 40)
        vertex(0, 25)
        vertex(-29, 40)
        vertex(-23, 7)
        vertex(-47, -15)
        vertex(-14, -20)
        end_shape("CLOSE")
and in draw(), you are iterating through an array of Star objects, displaying each one.
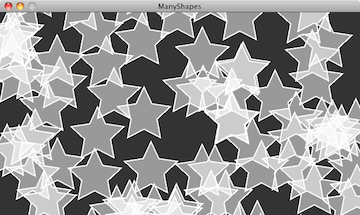
def draw():
        background(51)
        for i in range(len(stars)):
                stars[i].display()
class Star:
        def __init__(self):
                self.s = PShape()
                self.x = 0
                self.y = 0
That PShape then needs to be initialized in the constructor. This can be done directly, right there in the class.
class Star:
        def __init__(self):
                #  First create the shape
                self.s = PShape()
                # You can set fill and stroke
                self.s._fill(102)
                self.s.stroke(Color(255))
                self.s.stroke_weight(2)
                # Here, we are hardcoding a series of vertices

                with self.s.edit():
                        self.s.add_vertex((0, -50))
                        self.s.add_vertex((14, -20))
                        self.s.add_vertex((47, -15))
                        self.s.add_vertex((23, 7))
                        self.s.add_vertex((29, 40))
                        self.s.add_vertex((0, 25))
                        self.s.add_vertex((-29, 40))
                        self.s.add_vertex((-23, 7))
                        self.s.add_vertex((-47, -15))
                        self.s.add_vertex((-14, -20))
This method makes sense if each object itself has its own geometry, generated via an algorithm. However, if each object is displaying the identical PShape, it likely makes more sense to pass in a reference to a PShape in the constructor itself. Let’s take a look at how this might work. Let’s say we create a generic class called “Polygon” which has a reference to a PShape (which is draws in a display method).
class Polygon:
        def __init__(self, shape):
                self.s = shape

        def display():
                shape(s)
In the previous example, the shape was created right there in the object’s constructor. Here we are going to demonstrate a different way to write the constructor where the shape is set via an argument.
from p5 import *

poly = None

class Polygon:
    def __init__(self, shape):
        self.shape = shape

    def display(self):
        draw_shape(self.shape)

def setup():
    global poly
    size(640, 360)

    star = PShape()
    star._fill = Color(0, 127)
    with star.edit():
        star.add_vertex((0, -50))
        star.add_vertex((14, -20))
        star.add_vertex((47, -15))
        star.add_vertex((23, 7))
        star.add_vertex((29, 40))
        star.add_vertex((0, 25))
        star.add_vertex((-29, 40))
        star.add_vertex((-23, 7))
        star.add_vertex((-47, -15))
        star.add_vertex((-14, -20))

    poly = Polygon(star)

def draw():
    global poly
    background(255)
    poly.display()

if __name__ == '__main__':
    run()
This is a very flexible approach. For example if you had an array of PShape objects, you could create new Polygon objects each one with a random PShape.
PShape Groups
Another convenience of PShape is the ability to group shapes. For example, what if you wanted to create an alien creatures out of a set of circles, rectangles, and custom polygons. If the head were a circle and the body a rectangle, you might think you need:
from p5 import *

alien = None
head = None
body = None

def setup():
    global alien, head, body
    size(640, 360)
    alien = PShape([[0, 0]])
    head = PShape()
    body = PShape()

    with head.edit():
        head.add_vertex((-25, 0))
        head.add_vertex((25, 0))
        head.add_vertex((0, -50))


    with body.edit():
        body.add_vertex((-25, 0))
        body.add_vertex((25, 0))
        body.add_vertex((25, 100))
        body.add_vertex((-25, 100))

    alien.add_child(head)
    alien.add_child(body)
    no_loop()

def draw():
    global alien, body, head
    background(0)
    translate(width/2, height/2)
    draw_shape(alien)

if __name__ == '__main__':
    run()
PShape groups allow you build a sophisticated hierarchy of shapes. This in turn allows you to set the color and attributes of the child shapes by calling the corresponding method at the parent level. Similarly, by calling the transformation functions at a given level of the hierarchy, you only affect the shapes below.